
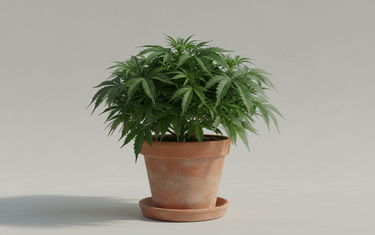
Short answer: Autoflower nutrients should be gentle, steady and simple. Feed a one-part main fertilizer from the first week, keep pH between 6.0 and 6.5, and build the dose up slowly. Add a bloom stimulator in mid flowering, and flush in the last week. Check the official feeding chart for the exact amounts per week.

Autoflower nutrients need a different approach than for photoperiod plants. An autoflowering plant has a short life. It starts to flower on its own after a few weeks, whatever the light schedule. There is no long vegetative phase in which you can correct mistakes. This guide shows what to feed an autoflower, how to build up the dose, and how to read your plant along the way.
1. Why autoflower nutrients are different
An autoflower grows and flowers at the same time for a large part of its life. That means it needs nitrogen for growth and phosphorus and potassium for flowers in the same weeks.
A short life cycle also means less time to recover from overfeeding. A dose that is fine for a large photoperiod plant can burn a small autoflower. This is why most growers start low and go up in small steps.
2. Choose one main fertilizer
The simplest approach is a one-part main fertilizer made for autoflowers. Bionova Autoflower Supermix is a one-component food grade mineral fertilizer with NPK 5-3-7 and a concentration of 1:400. You can use it from the first week of growth until one week before harvest.
Because it is one bottle, you have fewer ways to make a mix-up. That is useful when the plant has little time to recover.
3. Week-by-week feeding: how the schedule builds
The feeding chart for autoflowers follows the same logic every time: low at the start, highest in the middle of flowering, lower again at the end. The table below shows the pattern. For the exact amounts per week and the EC value, use the official Autoflower feeding chart.
| Phase | Main fertilizer | Stimulators | What to watch |
|---|---|---|---|
| Start (seedling and early growth) | Autoflower Supermix, low dose, see the feeding chart | Roots stimulator, see the feeding chart | Pale new growth means feed is too low. Dark, curled tips mean too high. |
| Mid growth and early flowering | Autoflower Supermix, dose goes up step by step | See the feeding chart | Steady green leaves, new growth every few days. |
| Mid flowering | Autoflower Supermix at the highest dose of the chart | PK 13-14 starts here, see the feeding chart | Brown leaf tips mean you reached the limit of your plant. |
| Last flowering | Dose goes down, see the feeding chart | See the feeding chart | Lower leaves may fade. This is normal late in the cycle. |
| Final week | Stop fertilizer and give plain water | None | Flushing is mandatory for Autoflower Supermix. |
The product page for Autoflower Supermix gives a working range of 13 to 27 ml per 10 litres of water. Your own dose inside that range depends on the week in the chart.

4. Mix in the right order
The order matters, because it keeps the nutrients available to the roots. This is the order from the Autoflower feeding chart:
- Fill your vessel with water.
- Add Autoflower Supermix and stir.
- Add PK 13-14 when the chart tells you to start it.
- Check pH and bring it to about 6.0 to 6.5.
If you use Silution, add it to the water first, wait 30 minutes, and then add the main fertilizer and stimulators.
5. Use EC and pH, not only the bottle
The EC values in the feeding chart are measured with reverse osmosis (RO) water at EC 0.0. If your tap water has its own EC, it adds to the number you read. So measure your starting water first, and keep the difference in mind.
Keep pH between 6.0 and 6.5. If pH drifts outside this range, the plant can struggle to take up nutrients even when the feed is right. See our PK 13-14 guide for how a stimulator fits in the same routine.

6. Adjust to your plant
The doses in the chart are safe values. Genetics differ, so you can change the dose in steps of 10%. Raise it until you see brown tips on the leaves, then go back one step. That is your plant's own limit.
If you use soft water or RO water, add Ca 15 and MgO 10, about 4 ml per 10 litres of each. Soft water has few minerals, and autoflowers can show calcium and magnesium problems quickly.
7. Common mistakes
Most problems come from one of four things: starting too high, changing too much at once, ignoring pH, and not flushing. Start low, change one thing at a time, measure pH at every feed, and give plain water in the last week.
Which product to start with
If you want the simplest start, the Autoflower Nutrient Pack combines Autoflower Supermix and The Missing Link and saves 15% compared to buying them separately. If you want to try the full range of stimulators, the Autoflower Exploration Pack contains Autoflower Supermix and the Bionova stimulators in smaller sizes. You can see all main fertilizers in our collection.
FAQ
What are the best nutrients for autoflowers?
A one-part main fertilizer made for autoflowers is the easiest option, because there is only one bottle to measure. Add stimulators only when the feeding chart tells you to.
When should I start fertilizing autoflowers?
With Autoflower Supermix you can start in the first week of growth, at a low dose from the feeding chart. Build up step by step.
What EC should I use for autoflowers?
Use the EC values in the official Autoflower feeding chart. They are measured with RO water at EC 0.0, so subtract the EC of your own water when you compare.
Do autoflowers need to be flushed?
Yes. For Autoflower Supermix, stop feeding one week before harvest and give plain water in that week.
